

Note: Bluetooth LE is available on iOS and Android only.
Overview
No more reading a frequency off one screen and dialing it into another. With remote tuning, you select a frequency in EasyVFR 4 and the app sends it straight to your radio.
EasyVFR 4 connects to your radio through a small adapter on the radio's serial port. You can connect over Bluetooth Low Energy (Bluetooth LE or BLE) or over Wi-Fi. Both work the same way: everything EasyVFR 4 can send over Bluetooth LE also works over Wi-Fi, and the other way around.
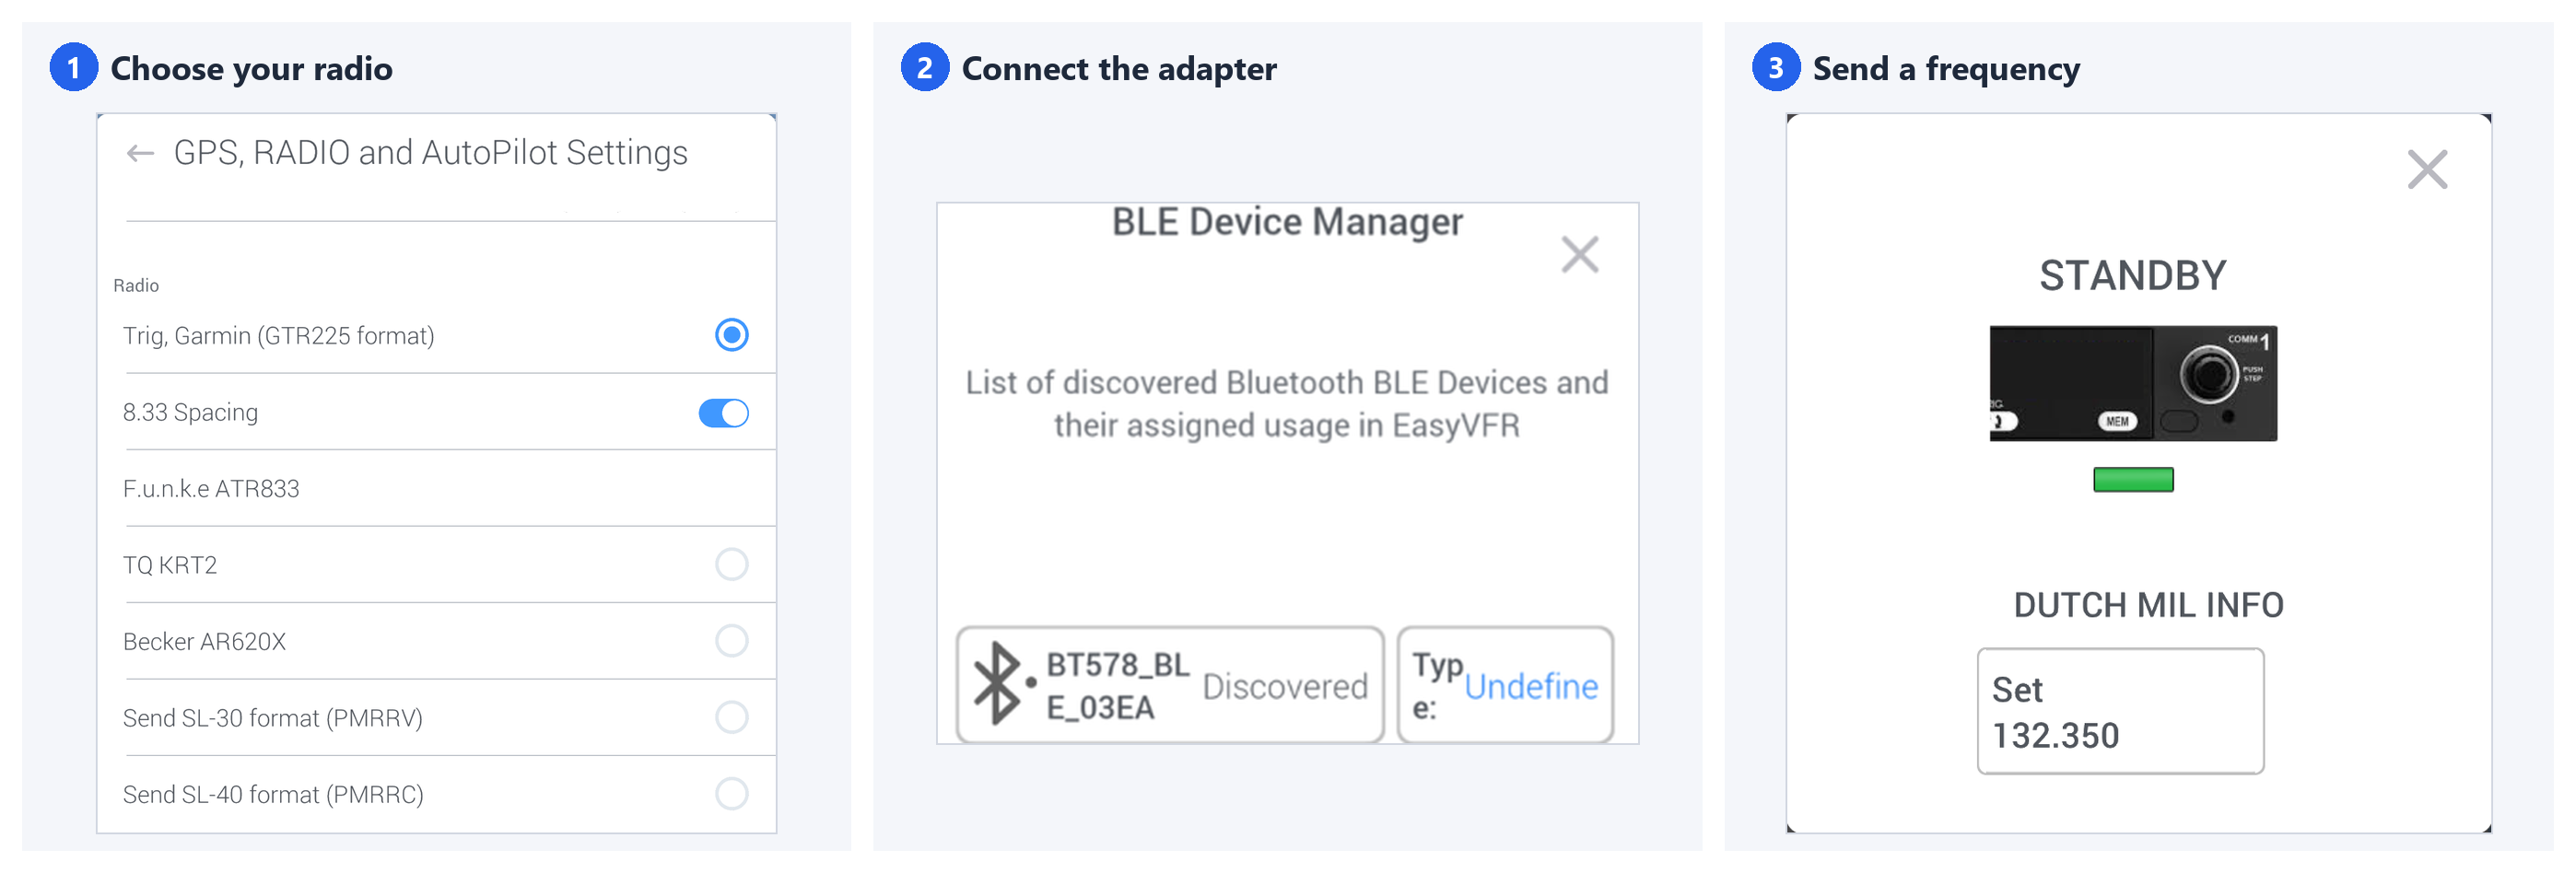
What you need
A radio with a serial (RS-232) interface that accepts frequency commands. See Choose your radio for the supported protocols.
A Bluetooth-to-RS-232 or Wi-Fi-to-RS-232 adapter. Connectors and pin layouts differ between radios, so we recommend an adapter made for your radio. Suppliers include SDLink, ADK Avionics and Prodimex.
Tip: we used the IRXON BT578 Bluetooth adapter during development and testing. It works well if you want to make your own cable.
Set up EasyVFR 4
Do the setup on the ground, with the radio switched on and the adapter connected.
Choose your radio
Open the EasyVFR 4 menu (select the logo button).
Select System → GPS, RADIO and AutoPilot Settings.
Scroll down to the Radio section.
Select your radio or its protocol:
Trig, Garmin (GTR225 format): the most complete protocol, with 8.33 kHz support
F.u.n.k.e ATR833
TQ KRT2
Becker AR620X
Send SL-30 format (PMRRV) and Send SL-40 format (PMRRC): older Garmin protocols that came before GTR225
If your radio uses 8.33 kHz channel spacing, turn on 8.33 Spacing.
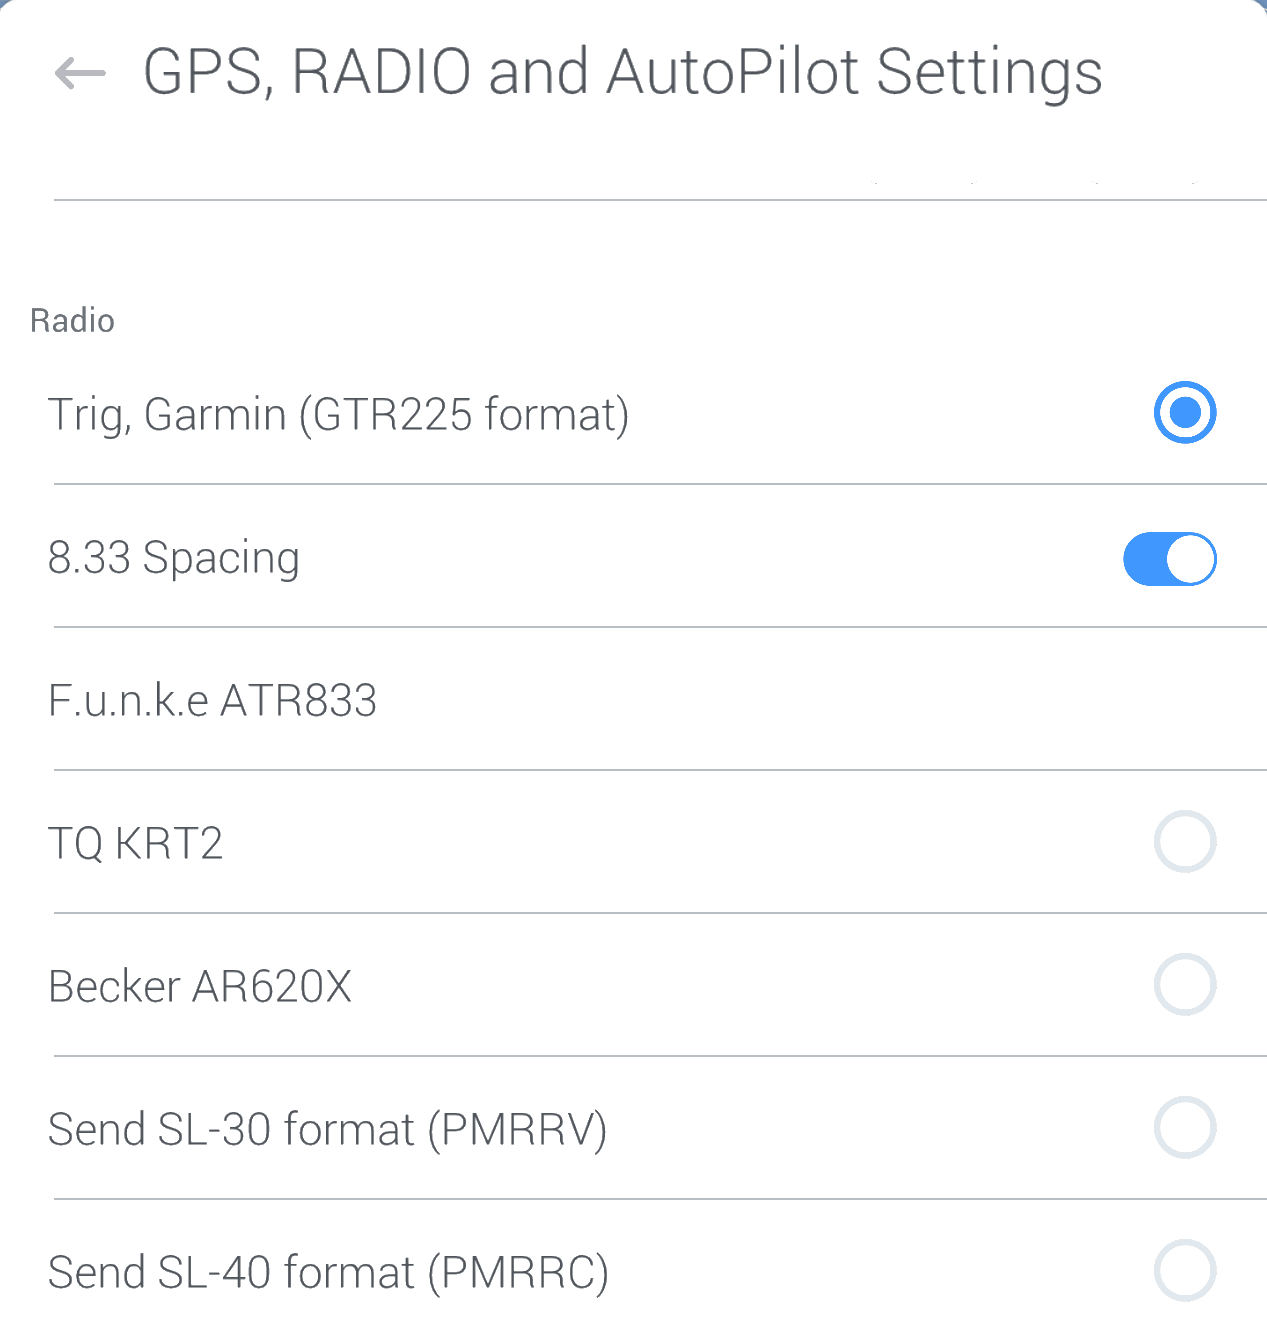
Radio not listed? Many radios understand one of these protocols anyway. Try them from top to bottom, starting with Trig, Garmin (GTR225 format).
Connect over Bluetooth LE
In GPS, RADIO and AutoPilot Settings, turn on Enable Bluetooth BLE.
Select Bluetooth BLE devices. The BLE Device Manager opens and lists all Bluetooth LE devices EasyVFR 4 has found nearby.
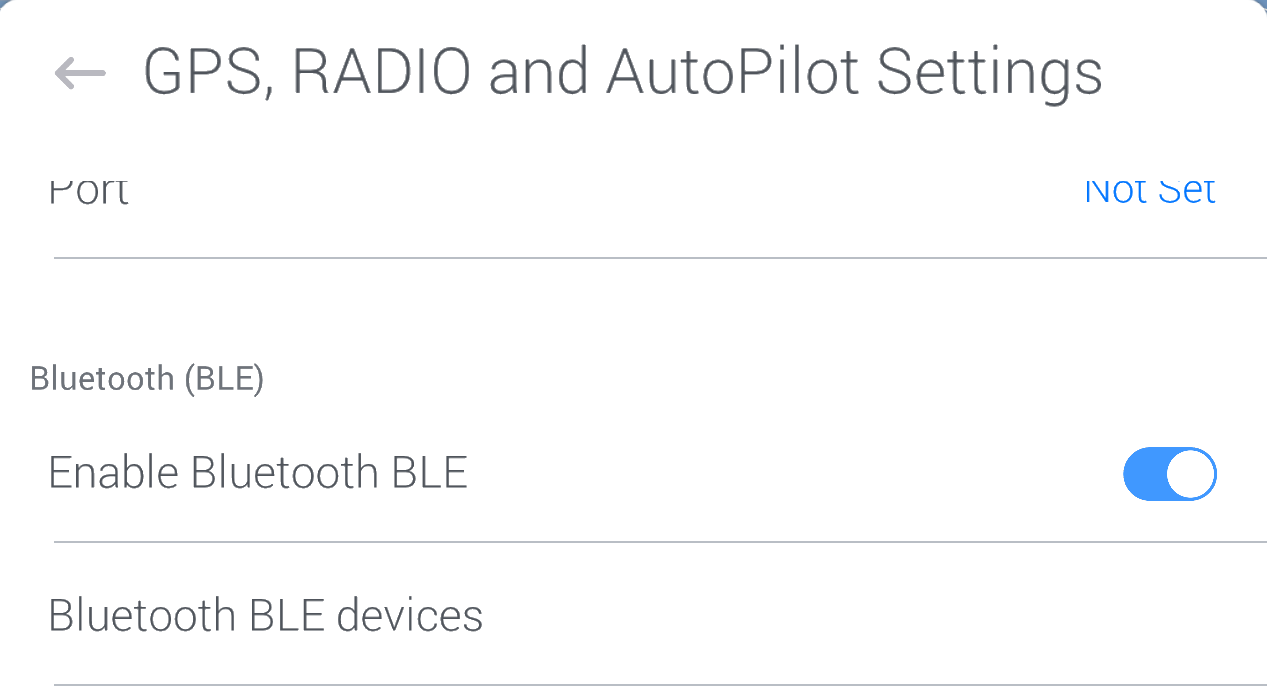
With Bluetooth LE enabled, EasyVFR 4 scans continuously for devices nearby.
In the BLE Device Manager:
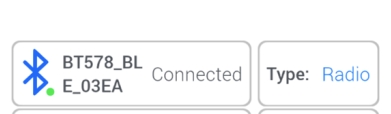
The left button shows the device name and its status, such as Discovered or Connected.
The right button shows how EasyVFR 4 uses the device (Type). New devices start as Undefined.
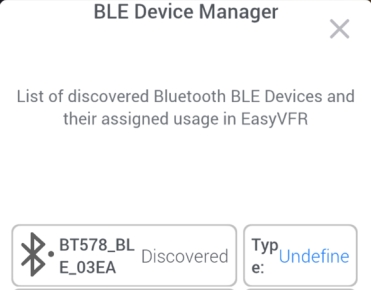
To connect your adapter:
Find your adapter in the list. Other Bluetooth devices nearby, such as a mouse or a TV, appear too.
Select its Type button until it shows Radio. Each selection moves to the next type: AutoPilot, GPS/Traffic, Radio and Undefined.
EasyVFR 4 now connects to the adapter. When it's connected, the Bluetooth icon turns blue with a green dot, and the status changes to Connected.
Connect over Wi-Fi
Prefer Wi-Fi? Use a Wi-Fi-to-RS-232 converter on the radio's serial port, and connect your device to the converter's Wi-Fi network. Autopilot and GPS sharing explains how to set up a Wi-Fi converter step by step.
Tune your radio
Where you can select a frequency
Once your radio is connected, you can select a frequency in these places:
Info Sheet → Airfield tab: select any frequency row.
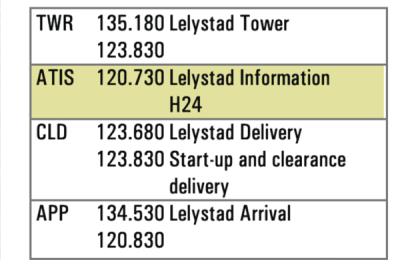
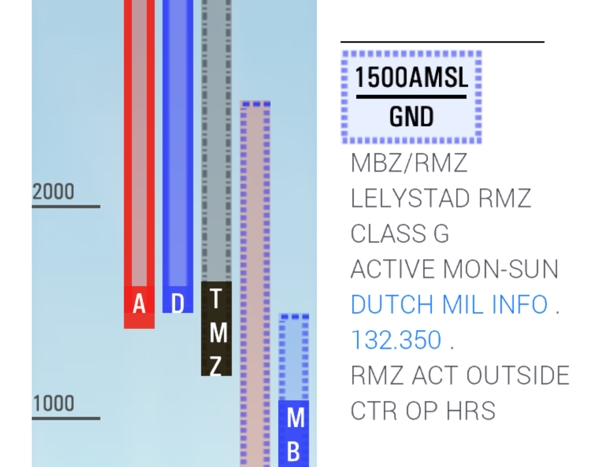
Info Sheet → Airspaces: select the blue frequency or ATC name.
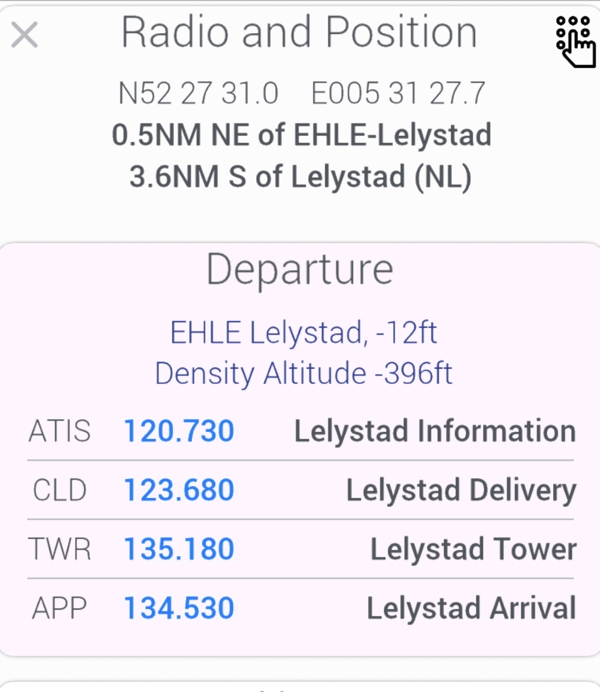
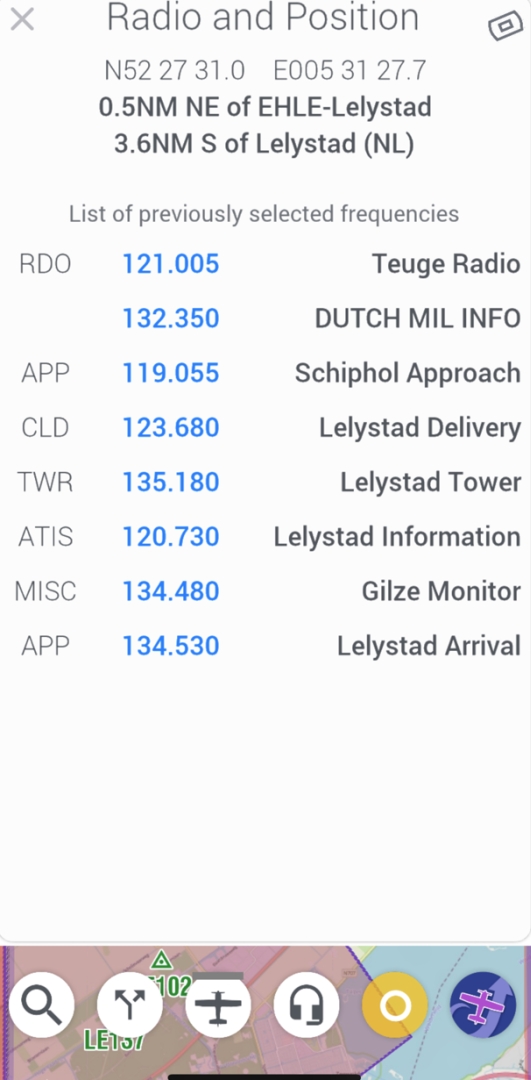
Radio and Position Card (🎧 on the Bottom Button Bar): select any blue frequency.
Send the frequency to your radio
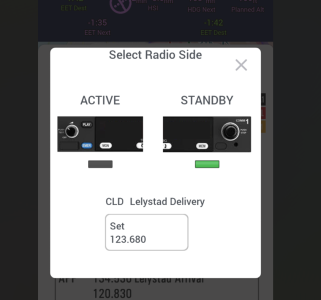
When you select a frequency, the Select Radio Side window opens.
Select ACTIVE or STANDBY. The selected side is marked green.
Select Set to tune your radio.
Enter a frequency manually
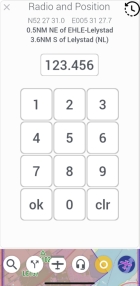
Open the Radio and Position Card.
Select the keypad icon at the top right.
Type the frequency and select ok.
Go back to a recent frequency
In keypad mode, the icon at the top right changes to a clock. Select it to see the frequencies you set before. Select one to switch back to it.
Select the icon at the top right once more to return to the standard Radio and Position Card.
Other devices
The same connections work for other devices. Over Bluetooth LE, set them up the same way, but choose a different Type in the BLE Device Manager:
GPS/Traffic: for example, a SafeSky AeroTracker as a source for position and traffic
AutoPilot: an RS-232 adapter that sends your route to the autopilot
Troubleshooting
My Bluetooth adapter isn't in the list. Check that Enable Bluetooth BLE is on, that Bluetooth is on in your device settings, and that EasyVFR 4 is allowed to use Bluetooth. Make sure the adapter has power.
The adapter shows Discovered, but doesn't connect. Set its Type to Radio.
The radio doesn't change frequency. Try the next protocol in the Radio section. If your radio supports standby only, send the frequency to STANDBY.
Safety and responsibility
Set up and test the connection on the ground, when you have plenty of time. Not just before a flight.
Always check the frequency on the radio itself before you transmit.
The pilot in command is responsible for the safe operation of all connected equipment.