Step 1: Connect to the SkyView Wi-Fi Network
Before initiating the transfer process, ensure that the SkyView Wi-Fi network is properly set up. Once confirmed, connect your tablet device to the Dynon Wi-Fi network to establish a stable connection.
You find the Wi-Fi password on your SkyView at SETUP MENU -> SYSTEM SETUP -> WI-FI SETUP.

Step 2: Verify Data Reception on EasyVFR4 from SkyView
Open the Status Card:
Tap on the Status dot (which could be red, amber, or green).
Select the 'Position' option to open the Status card.
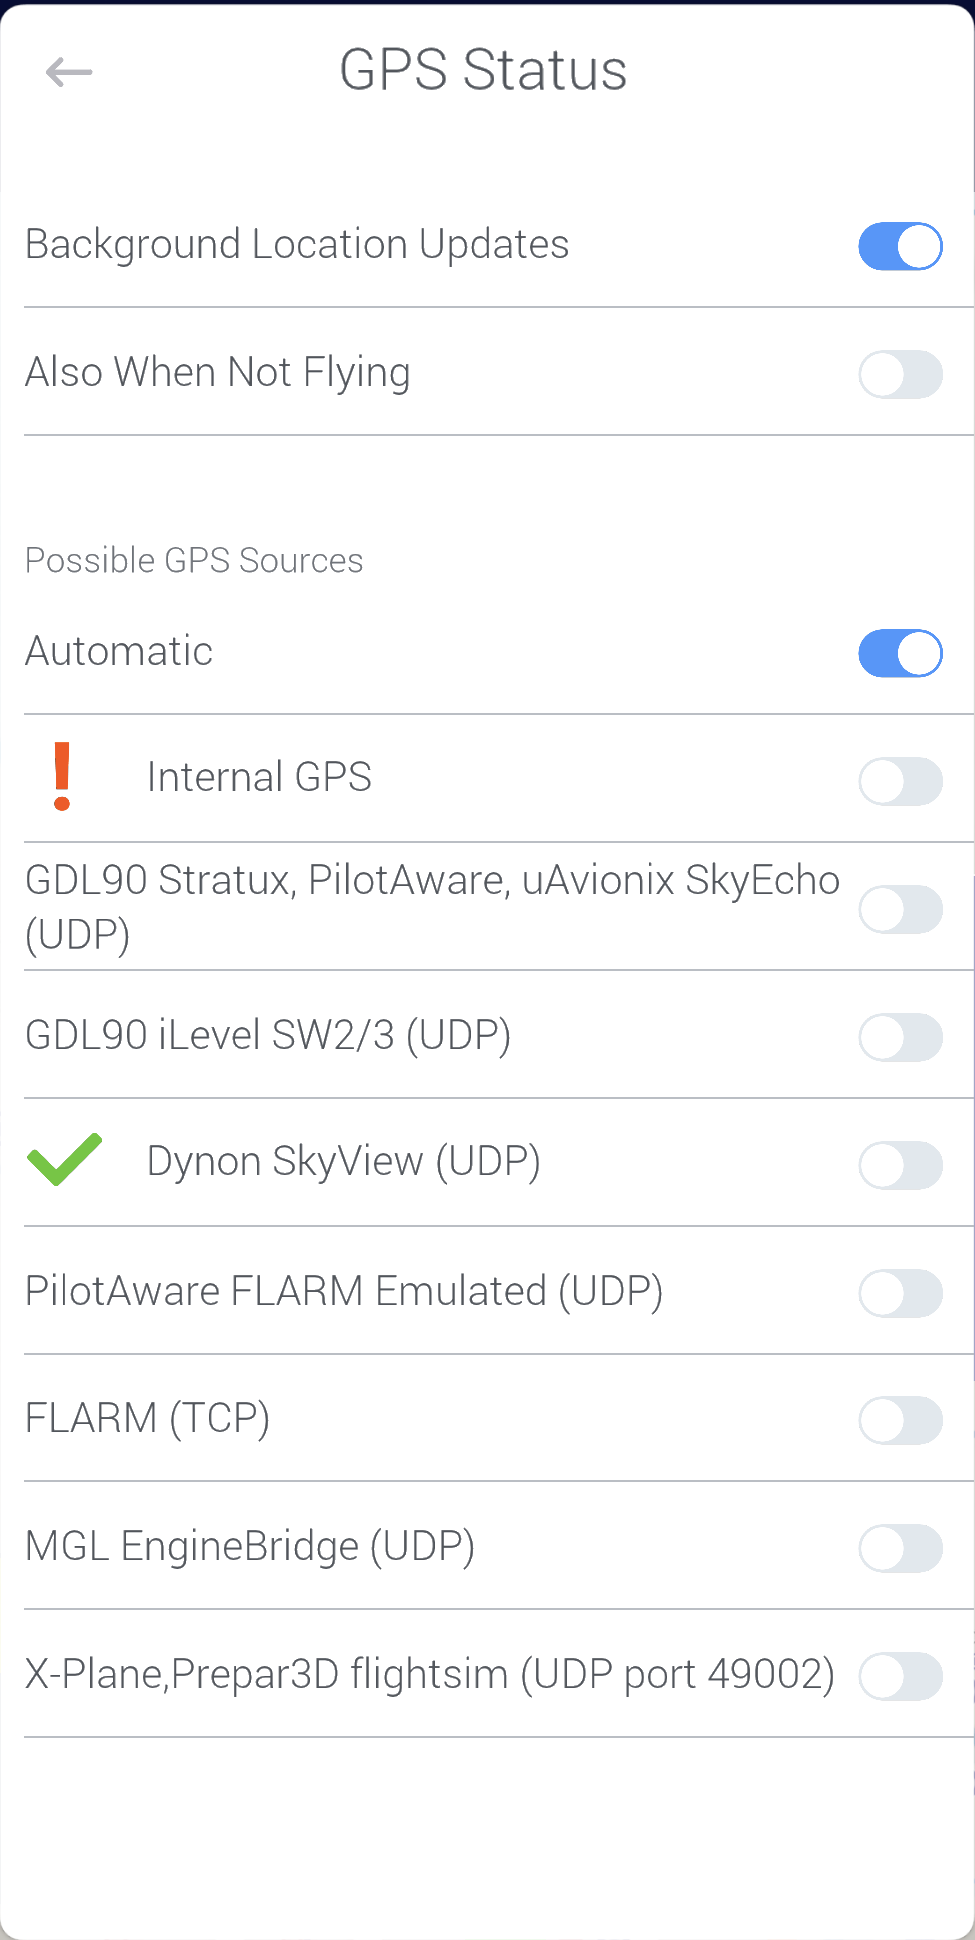
Review Connection Status:
A list of all connections supported by EasyVFR4 will be displayed.
Active connections are indicated by a green checkmark.
Understand Connection Indicators:
No Icon: The connection is inactive or not receiving data.
Orange Circle: The connection is active but the GPS data is unreliable. It can still receive traffic data or send/receive flight plans but won’t be used as a position source.
Green Checkmark: The connection is active and reliable, serving as the GPS position source.
Red Exclamation Mark: The connection is either unrecognized or the GPS data is unreliable.
Automatic Option (Recommended):
When enabled, EasyVFR4 automatically selects the best available GPS location source. If the primary source fails, it switches to the next best option, notifying the user of the switch.
Step 3: Load or Create a Flight Plan in EasyVFR
Either load an existing route or create a new one for your journey.
Step 4: Transfer Route to/from SkyView
Open Dynon SkyView menu:
Open EasyVFR 4 menu (by tapping the EasyVFR logo)
Open Dynon SkyView menu
Select 'SkyView Get/Send Route' from the Route Tools.
If the option is unavailable, revisit Step 1 to ensure your tablet maintains a connection with the SkyView Wi-Fi.
Prevent Connection Switch:
Note: Both Android and iOS devices may automatically switch to another WiFi network that provides internet access. Monitor your connection to prevent disruptions during the transfer process.
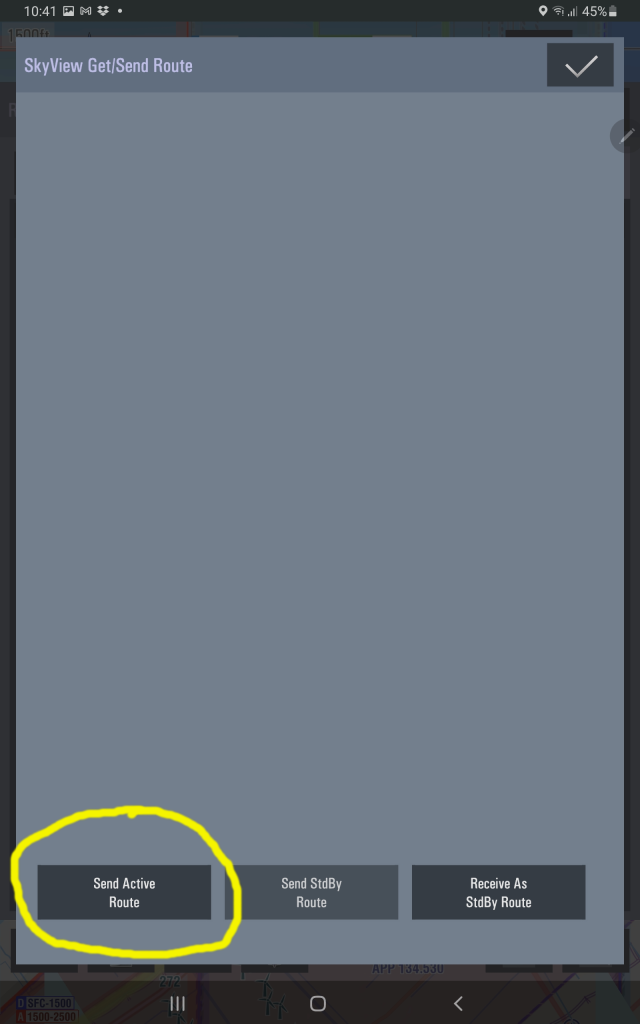
Send Active Route:
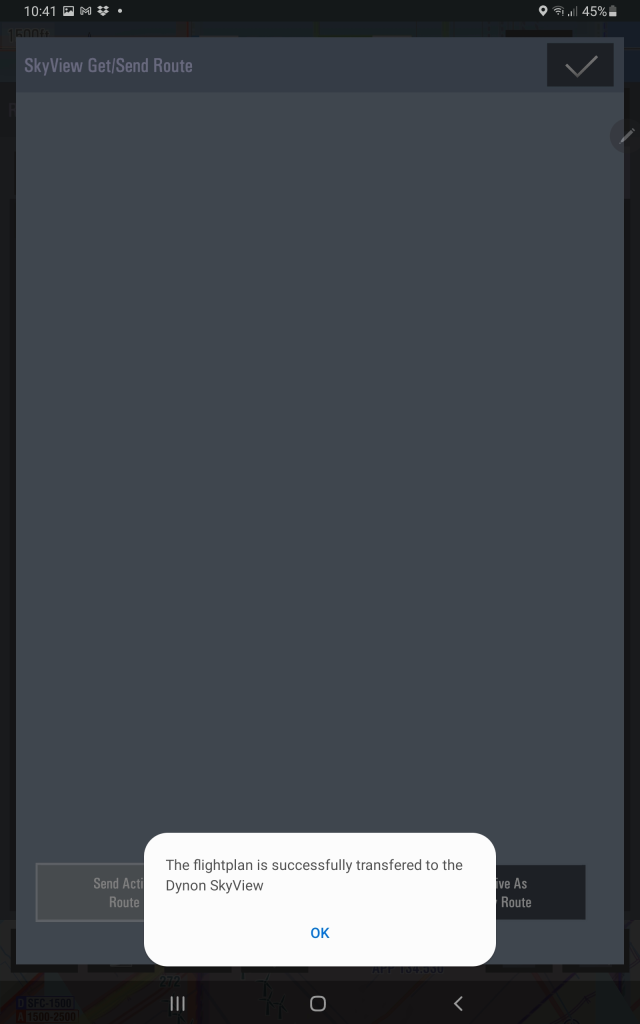
Choose 'Send Active Route'. Upon completion, a notification confirming the successful transfer of the flight plan will appear on your device's screen. Ensure to acknowledge this notification to complete the process.
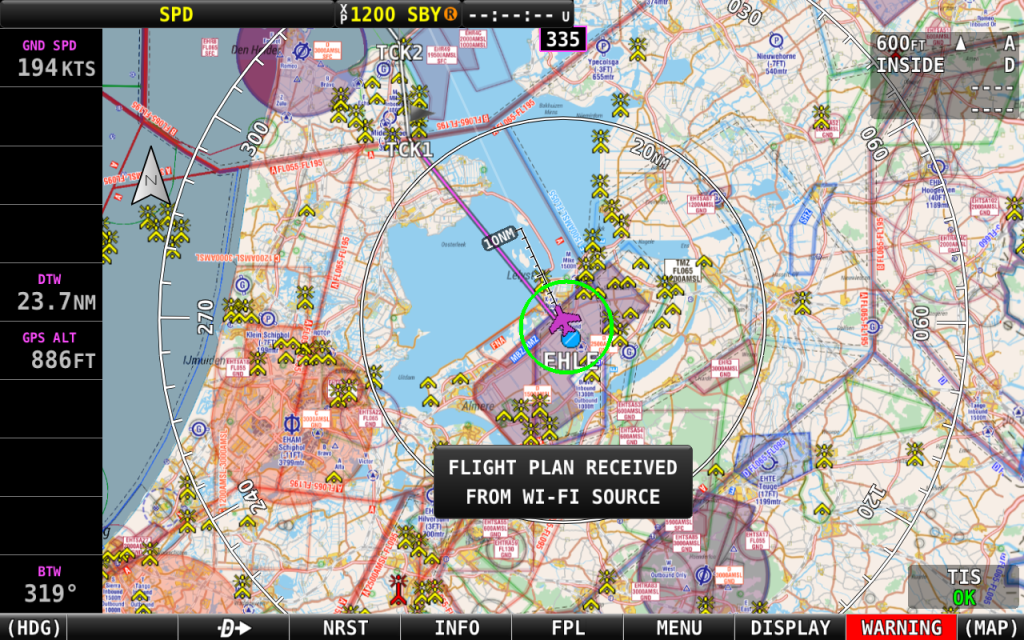
On receiving the route, SkyView will show the message "Flight Plan Received From Wi-Fi Source".
Conclusion
Following these steps meticulously will ensure seamless flight plan transfers between EasyVFR4 and Dynon SkyView EFIS systems. For optimal performance, maintain a stable connection and monitor the process for any prompts or notifications that require user acknowledgment.
IMPORTANT FOR APPLE iOS and iPAD users:
Some users get an error when trying to send a flightplan to their Dynon SkyView. To fix this problem make sure that EasyVFR4 has access to Local Network. This can be set using the Apple Settings page, then choose Privacy, and then choose [Local Network]. Here is a list of all apps that requested local network access, one of them should be EasyVFR4.